Implementing a dropped objects prevention plan
A roadmap for reducing risks
Like climbing ladders or stairs, there are steps to take to implement a dropped objects prevention plan on your jobsite. Regardless of industry, the following steps lead to success:
Call to action
First, an “aha!” moment occurs, a bolt of recognition when a site safety manager or supervisor recognizes dropped objects as a potential hazard on their jobsite and decides to address them.
It could be reactive in nature, a decision made after an injury or incident (near-miss, equipment damage, etc.) on the job, or the potential for an accident/injury causes recognition of jobsite deficiencies that leads to a more proactive approach.
Identify risk & define scope
Once triggered, take time to identify the risk and define the scope of the hazard in your environment:
- Who: Think of your own crew and how its work may impact clients, customers, vendors, jobsite deliveries – even the public. Are any of those third-parties at risk when a tool or an object is dropped?
- What: The potential dropped objects or other unsafe objects (i.e., trip hazards) that should be managed.
- Where: The at-heights areas on the jobsite where these risks present themselves, or have the potential to present themselves.
Defining your scope takes these elements and adds the “When” and “How” of your rollout plan.
- When: Determine a timeline, and set goals within that timeline.
- How: Consider what types of controls can be implemented through the Hierarchy of Controls (HOC).
Consider all the above and identify an area, site, and/or application where you want to start affecting change. This will be the pilot study for your program. If one specific area has a higher risk level or frequent incidents, start there. Communication and focus on the objects in that job/area are important.
- Notify the pilot area about the potential for dropped objects and the goals you have for a program. Ensure there is buy-in to be part of the pilot study.
- Think about the kind of work being done in that area. Are there sensitive operations underway or sensitive equipment being used or worked on?
- Complete an inventory for all at-heights tools in this area. This should include any object or item that can fall such as tools, personal items, PPE and more.
- Choose 6-10 tools from this inventory to be part of the pilot study. Pick the “usual suspects”, considering frequency of use and potential severity of damage if dropped.
Observation/site assessment
To assess a worksite, spend time monitoring at-heights work in your pilot area to identify and analyze potential and actual safety hazards, which may vary from jobsite to jobsite.
Once that’s done, work through the HOC to seek safety solutions for the pilot area. Consider tethering and topping solutions, anchor points, clearance, and other challenges/competing hazards that may complicate your efforts. Document your discoveries and ideas, and file those away for future reference.
Think about levels other than the one on which you’re standing. Dropped object causes can originate on the ground before acceding to height or happen while at height. There are several factors that can lead to them, including:
- Elements like environmental conditions
- Worker-generated situations
- Poor housekeeping
- Improper equipment transport
- Site risks
Training
Hold initial OSH training and identify workers whom you may want to be involved in a pilot study and other safety managers. Next, choose two workplace safety champions: a tools and installations leader and a process and use leader. These should be responsible colleagues whom you trust to follow the rules and set a positive example for their co-workers.
Controlled implementation
Once you’ve observed your site and trained your workers, you’re ready to roll out your dropped objects plan in your previously identified pilot area. Analyze your findings from the observation and assessment of your pilot area that you should have completed.
Determine whether any hazards can be fixed, substituted for, or outright eliminated. Utilize passive engineering controls, such as toe boards, netting or barricades, or active engineering controls using the 3T’s (trapping, tethering and topping) to address unsafe conditions that can’t be “fixed.”
Implement administrative controls like policies and procedures, training and spreading awareness. And though it is a last line of defense, establish PPE procedures.
Policy creation
After your pilot study has concluded, summarize your findings and freeze the processes put in place. This will be the foundation of your Objects at Heights Policy. A complete policy should include:
- Introduction
- Scope
- Responsibilities
- Hazard Analysis, Risk Assessment and Task Planning
- Worksite Inspection
Launch
Launching your new dropped objects prevention program will be a trial-and-error process, so anticipate that you will need to analyze and optimize the program once enough time has passed before you can expand it to the rest of your company.
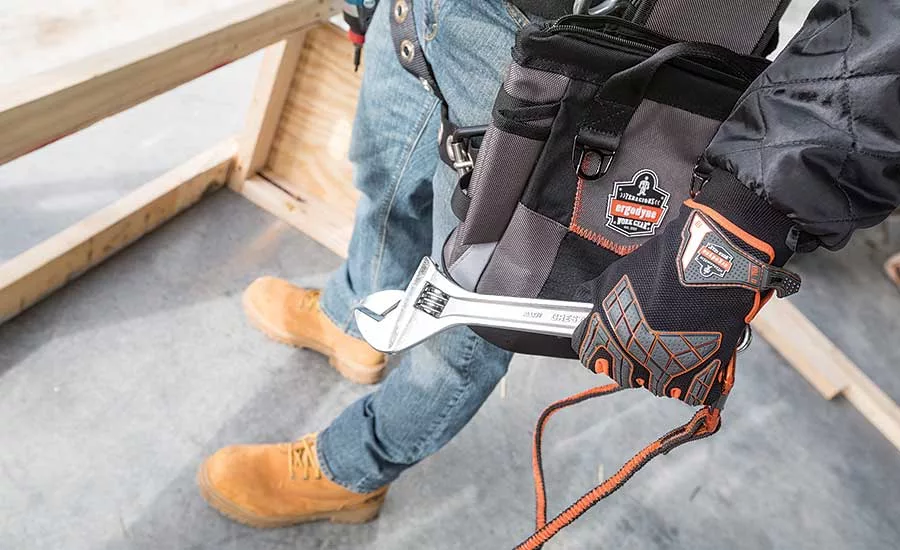
Conduct safety training with your workers, per your documented objects at heights policy. Decide how many tools need to be tethered at height based on your tool inventory log and purchase these solutions. Under the oversight of your Tool & Equipment Champion, install the safety solutions for the tools (large and small) that you will be using at heights. Decide which should be trapped, tethered and topped, and make sure each crew member feels comfortable doing so.
Review & expand
After a predetermined period, review how the program is working. Document changes and see if your goals are being met. You should expand it to other areas, jobs, tasks, tools, etc. only after you feel comfortable that any adjustments are modest in nature.
Remember, objects at heights controls must be implemented, maintained, and used correctly for them to be effective. Holistic management of an effective DROPS program means continuous assessment and improvement from safety managers and executives. Otherwise, people (and equipment) will remain at risk.
Looking for a reprint of this article?
From high-res PDFs to custom plaques, order your copy today!