Here are three image-based safety training activities

As the old adage goes, “A Picture is Worth a Thousand Words” and this is true for safety training. If someone has the choice to look at an image in an effort to gain understanding of something, or read a paragraph or more of text, the visual option will be much more inviting.
Presenting safety training with visual aids such as images helps establish and maintain attention, but all images are not created equal. Good safety training images are easily recognizable, and easily and universally understood. A good image should appeal to the audience while effectively providing knowledge that enables a clear understanding. A good safety training image should also aid in retention. It should impart memorable knowledge. Visuals should also provide information in a form that the trainee can quickly and easily interpret.
Games & activities
Most experienced safety trainers incorporate opportunities for interactive class involvement into their training classes. There are a number of games and activities available that can be a great addition to safety training classes if they are well-planned and directly related to the class content.
Unfortunately, many activities are based on the premise that the trainees can read and write English. This is where an image-based training activity can be extremely effective. Many workers do not have English as their first language. A study by the U.S. government found that approximately 40 percent of the U.S. workforce is functionally illiterate -- so image-based training activities are even more valuable. Three simple image-based activities you can create yourself are described below. For examples of these and more, visit www.freesafetygames.com.
“Hazard Hunt”
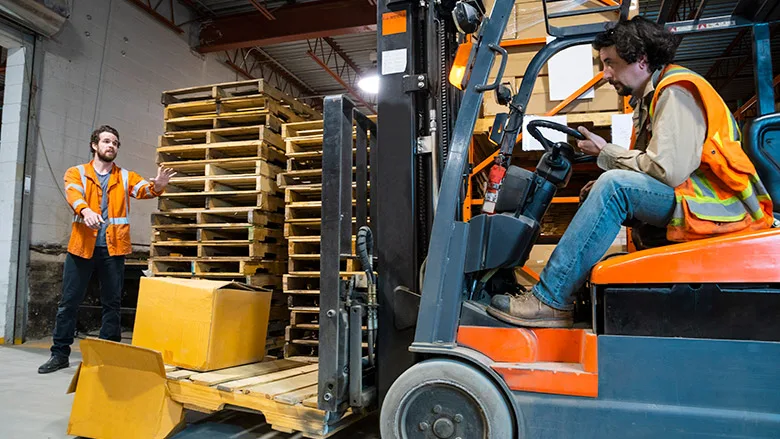
Hidden Pictures or Hazard Hunt is a game that includes a small group working together to identify hazards in a supplied photo or drawing. You can take a photo yourself, enlarge it and make copies for the group. A photo or drawing should have at least six hazards included and the hazards should not all be obvious. If possible, the hazards should be related to class content, although this is a great activity for general safety training classes such as training on hazard recognition.
With most safety training games and activities, it’s recommended that a class of trainees be divided into smaller groups or teams. Give each small group a copy of the picture. Ask them to study the picture and as a team list the hazards that they find. After ten minutes or so, stop the group discussions and ask each group to report how many hazards they identified. It is highly likely that the various groups will have identified a different number of hazards and will have found different things.
Start with the group with the biggest list and ask them to identify their hazards. If they name something that another team did not include it will likely lead to lively discussion and that is a valuable part of this exercise. You can also lead a discussion around the different hazards found and more generally, why some groups identified some hazards and others did not.
“Safety Sequence”
Safety Sequence is a good activity for training topics that include a series of steps, such as lock out-tag out or confined space entry. Safety Sequence (with pictures) can be a real learning tool.
To organize the game, you’ll need to find a simple illustration or photo (one you take yourself is fine if the picture is clear and clearly shows the step) of each step of the procedure. For a simple lockout-tagout exercise, the photos you might want to include would show: 1) Determine the Hazards; 2) Notify Others; 3) Isolate Energy Sources; 4) Remove Potential Energy; 5) Verify Lock Out; 6) Perform Work; 7) Prepare to Start up again; 8) Remove locks and tags; 9) Test Equipment; and 10) Notify others when work is complete.
Make copies of these photos or drawings so you can give one set to each group of trainees. After the class material has been presented, shuffle the cards and give a complete set to each group. Ask the teams to work quickly together to get the steps in the correct order. When a team has signaled that they are finished, ask them to announce their steps, in the proper order, to the rest of the class. If the order is not correct, tell them to try again and have all teams continue until a winner is found.
“Pin the Pain”
To play Pin the Pain, you can make a simple line drawing or find a simple body outline (that is not copyright-protected) by searching for one in Google Images. After presenting the class information, give each team a copy of the body outline and a pack of push pins or small colored stickers and ask them to “Pin the Pain.” Based on the information you just presented, tell the trainees they are to identify where injury or illness could occur as a result of improperly working with the chemical or activity you are describing in the training class.
For example, if you were presenting a class on the safe handling of hydrofluoric acid you would expect each group to “Pin the Pain” on the eyes, skin, heart, nose and lungs for example. After each team has had the chance to “Pin the Pain,” ask them to present their body outline and explain why they pinned the areas they did.
Research shows that 83 percent of what we learn is through sight. We see good images every day and everywhere. There is no excuse to limit ourselves to generic clip art. It’s easier than ever to create visuals to enhance training content. By relying more on images to get our message across, safety training is more effective for everyone.
Looking for a reprint of this article?
From high-res PDFs to custom plaques, order your copy today!